Set up a Funding Schedule (FS)
Prerequities.
Approval is provided from the Business Owner (the project's P2i Senior Director).
There is an existing Funding and Services Details (FSD) for this organisation. If there is no existing FSD, create a new project using the Social Services Procurement - FSD template (refer to Set up a funding and service details) xxxx -- this ilink needs to change!!!.
An FS (contract) must be created in a project from the Create, Set-up And Approve Contract task.
If no Go-To-Market activity has occurred, create a new project in P2i and start the Create, Set-up And Approve Contract task.
The P2i Senior User role is responsible for setting up the FS in P2i.
The P2i Contract Officer is responsible for emailing the agreement to the supplier and activating the contract in P2i once the agreement has been co-signed and attached to the Funding and Services Details.
Refer to Prepare a Funding Schedule (FS) Contract video.
Warning Do not use the browser's back button or refresh button while using P2i.
To set up the Funding Schedule:
-
Click the Sourcing icon and click Projects and then click My Projects.

-
Search for and select the procurement project where the funding schedule is being created.
Tip To see how to search for projects, refer to the topic, Searching for Projects and Contracts in P2i.
-
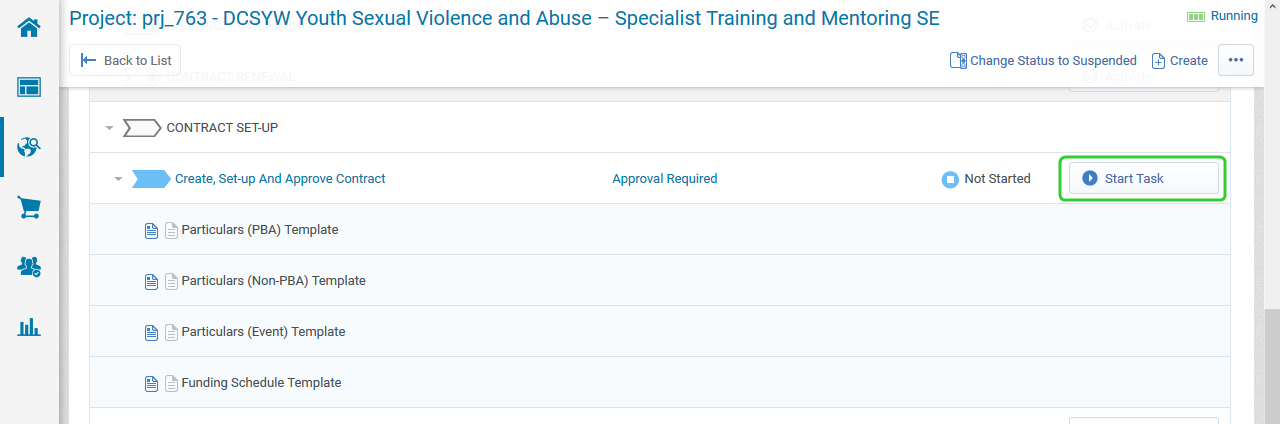
Click Start Task next to Create, Set-up and approve contract.
Tip The Create, Set-up And Approve Contract task is already Running when followed steps xxxx in create procurement project.
-
Click Confirm.
-
Click Confirm.
Note The double confirmation step is an important part of the P2i solution. The second Confirm is used for auditing purposes and allows the user to provide supporting comments and attachments as to why the change in the workflow was made.
-
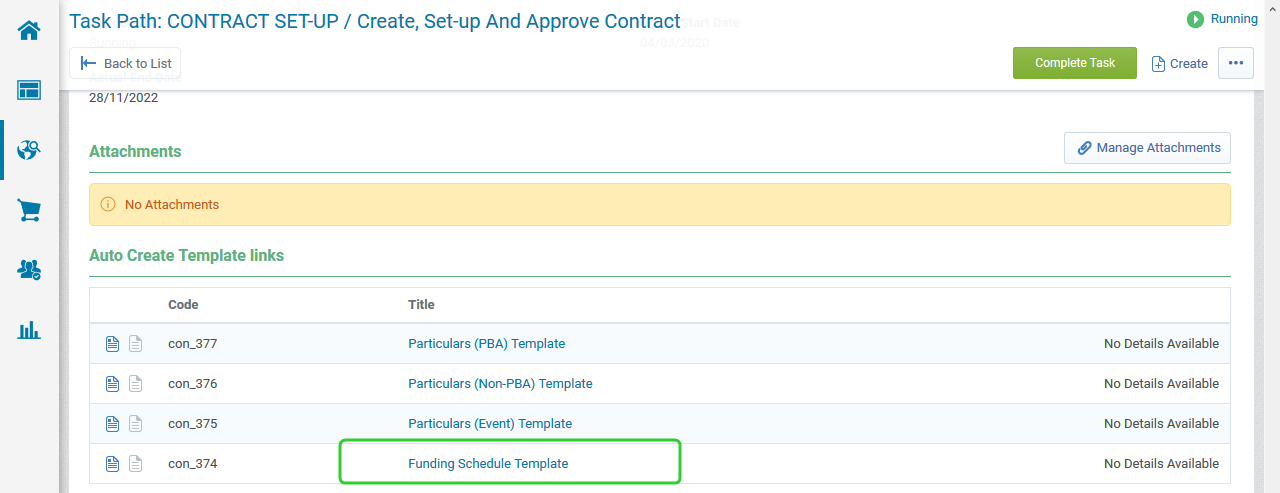
Refer to the Task Instructions.
-
Scroll down and select the Funding Schedule Template in the Auto Create Template links section.
-
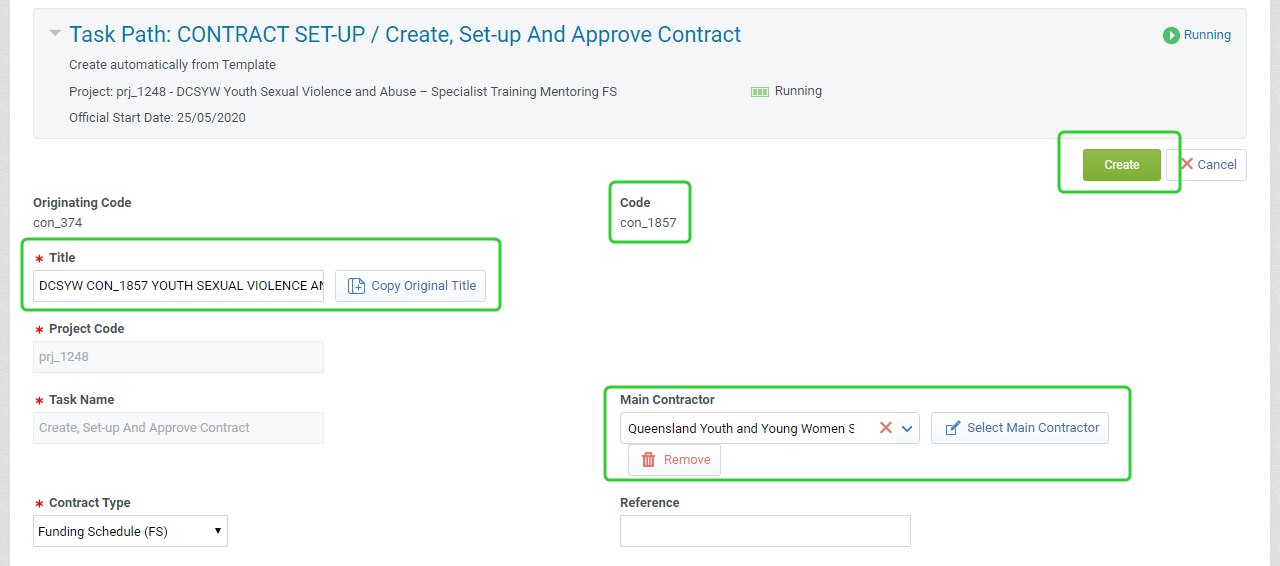
Enter the Contract Title.
-
Enter or select the Main Contractor.
Warning You must select the Supplier approved by the Business Owner in at the end of the RFQ process.
-
Add a Reference if required.
Tip Refer to your department's processes for guidance on how to use the Reference field.
-
Click Create.
Warning Do not change the Contract Type. The Funding Schedule template has already been chosen.
Each template has automatically generated clauses when selected. Changing the Contract Type does not change these clauses and the contract will be generated incorrectly.
-
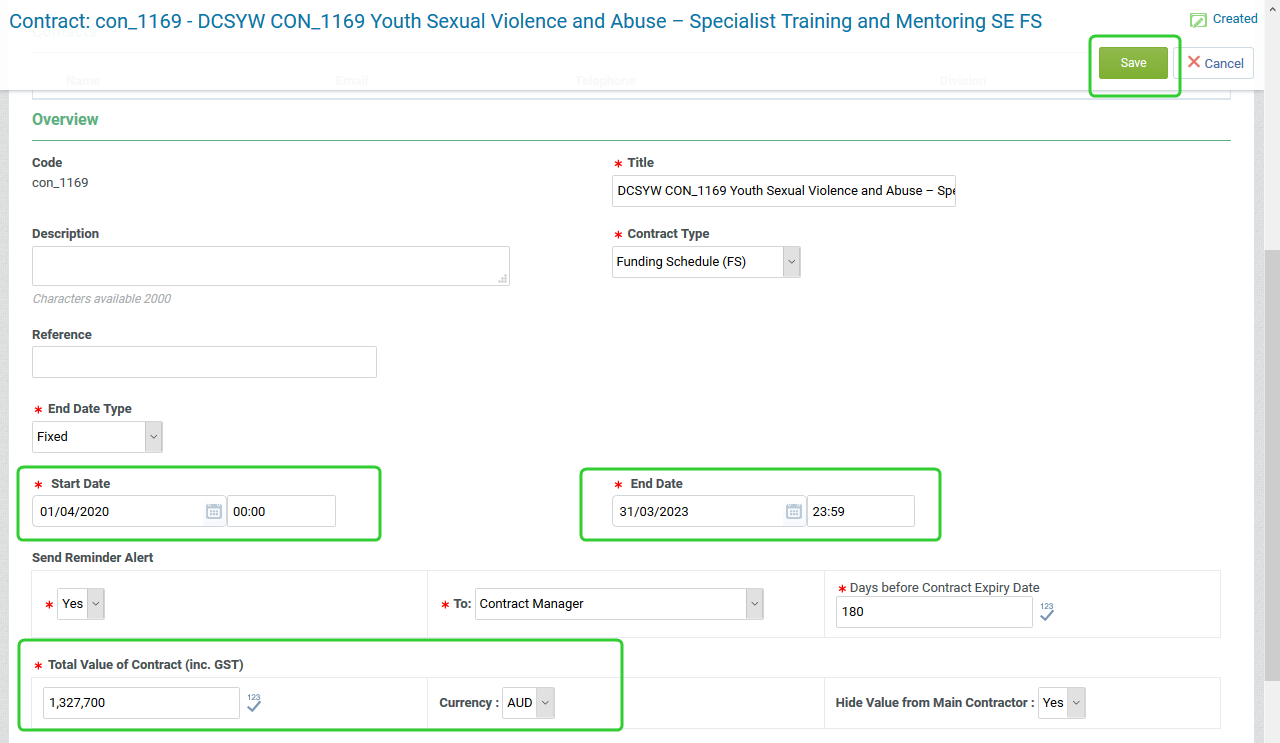
Complete the Overview form including the Start Date and the End Date.
-
Enter the Total Value of the Contract (inc. GST).
-
Set the Send Reminder Alert, who you want the alert to go to, and the Days before Contract Expiry Date.
Tip You can also select:
-
Contract Manager - is the P2i Contract Officer
-
Buyers (as per user rights) - everyone on the project team
-
Buyers, Main Contractor and Contract Manager - the P2i Contract Officer, everyone on the project team, the nominated contact for the organisation.
-
-
Add a Description if required.
Tip Refer to your department's processes for guidance on how to use the Description field.
-
Leave Manage Subcontractors set to No as each Organisation requires its own Contract in P2i.
-
Leave Manage Prices and Manage Master Document set to Yes as these are required for setting up the funding amounts and the contract.
-
Leave Manage Discussions set to Yes as this allows you to use the discussion area of P2i to discuss the contract with project team members.
-
Click Save.
Note Set up your Contract, capture key documents and project team.
1. To the collaboration attach approved Contract set up documents visible only to the department, including for example:
a. Value Risk Matrix
b. Sourcing lead to draft contract management plan/checklist
c. Contract to complete Contract Management plan/checklist
d. Funding Memorandum of Approval (where not already captured in an RFQ process)
e. Letter of offer.
f. Other form(s) as appropriate
Please obtain approval for Contract set up documents offline, scan and add to P2i.
2. Set up the appropriate contract in P2i based on the contract classification determined by the Value Risk Matrix assessment
a) If your Value Risk Matrix assessment requires a Funding Schedule, please create a Funding Schedule project in P2i and either create a new Funding and Services Details or relate to an existing Funding and Services Details.
b) If your Value Risk Matrix does not require a Funding Schedule, create the relevant Particular in P2i.
3. Please approve the Particulars or Funding Schedule so that it can be shared with the Supplier as a draft via P2i
Also, please ensure you add the following wording to your approval request
" By approving this contract setup request, you acknowledge:
1. Funding has been approved by appropriate financial delegate
2. Documents have been reviewed, and
3. Contract setup can progress per the FMA recommendation
If you reject, please provide comment when prompted."
When selecting Activate on any object select the option "Do Not Start These Tasks". Tasks are to be started only once they are required.
Note Use the following naming convention for the Contract Title and funding schedule document:
Department/Contract Number/Program/Service Outlet No. FS
DCYJMA CON_234 YOUTH AT RISK 123234 FS
The Contract Code is generate automatically by P2i and is displayed on the screen as con_####.
Note These form the Important Dates section of the Funding Schedule which contains the Services Start Date and the Agreement Expiry Date.
Warning The Budget Tool is always the source of truth for the total values of the funding schedule.
The Funding Schedule shows the funding amount inclusive of GST. Currently all agreements (and approval letters) show funding amount EXCLUSIVE of GST. The reason is not all funded services attract GST. The Standard Terms and Conditions states Funding is exclusive of GST (See Service Agreement Standard Terms, clause 8.2a and Short Form Terms and Conditions clause 8.1). The financial delegate is currently provided with both a GST inclusive and GST exclusive funding amount to approve.
Leave Currency set to AUD and Hide Value from Main Contractor set to Yes.
Warning
Note The next step in setting up the funding schedule is to create the funding amounts (i.e. create a price list). Refer to Creating the per-annum and one-off funding amounts that form the deliverables.